Thursday, March 24, 2016

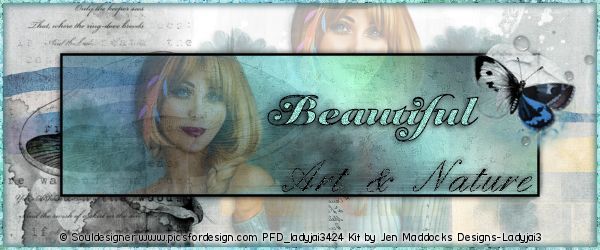
Art & Nature snags


here is a set of snags I made using the beautiful art of

© Souldesigner

you can purchase this gorgeous tube at

the kit I used was a freebie from
Jen Maddocks Designs

you can see her collection at


Enjoy and have a good weekend!


Thursday, March 17, 2016

Beachy Springtime PTU tutorial


Beachy Springtime PTU Tutorial
by Ladyjai3Creations
March 2016


supplies

Beachy Springtime Scrapkit by

Pink Paradox Productions

you can purchase the kit here

http://www.pinkparadoxproductions.com/store


filters


eye candy 4000- gradient glow & HSB noise (optional)

a tube

i am using a tube by © Alex Prihodko

you can purchase this tube and a license at


i am using the font Lighthouse personal use for my name


ok lets go


open a new image 600 x 250, select all


copy & paste paper 15, move it around a bit so you can see the sand, select none


go to bottom layer select all , then to top layer, image crop to selection


c&p ele 76 resize by 50% place on left side of tag, sharpen add DS (2 -2 68 7)


c&p ele 69 resize by 40% then by 70% place on right side of tag


c&p ele 100 resize by 40% image mirror then place behind lighthouse ( you can resize it more if it doesnt look right)


c&p ele 136 resize by 40% then 70% place behind lighthouse sharpen then add DS (same settings)


c&p ele 116 resize by 40% then by 70% place on left side in front of bridge


(sharpen, add DS)


c&p your tube,image mirror, resize by 55% and place in center, sharpen add DS


c&p ele 78 resize by 30% then 70% and place behind tube in front of grass, sharpen add DS


copy& paste elements 80 & 81 resize them by 30% then 70% place them behind tube (look to my tag for placement)


sharpen them and add DS


c&p ele 58 resize by 40% and place on bridge sharpen add DS


go to top layer, select all, take a color from your tube with the dropper tool (used the light blue of her dress)


flood fill with your color, selections modify contract by 3 hit delete on keyboard selections invert


use eye candy 4000 HSB noise with default settings, select none


adjust add noise uniform at 40% then add noise random at 50%


add a thin gradient glow with the same color as your frame, add DS


i also added a gradient glow to the copyrights, just to look clearer.


add your copyrights and license number, merge all flatten save as jpg


you are done! i hope you enjoyed this tutorial and it was easy to follow. i would love to see your results, send them to me and i will showcase them here
thanks for trying my tutorial.


Ladyjai3Creations
March 2016


St Pats Extras


here are some extras I made for St Patricks Day using the beautiful art of

© Alehandra Vanhek

you can find this and her other beautiful art at
www.picsfordesign.com


The kit used is by GOF_Designs and you can purchase it at
www.picsfordesign.com

The kit is Lucky Me
and the tube is an exclusive

Enjoy and Happy St Pats Day!


Friday, March 4, 2016

Tag show off


Tag show off using a fabulous tube by
© Alehandra Vanhek


you can purchase this tube at


and her other fabulous works of art


I hope you like Cookie and Alehandra


Enjoy!


Wednesday, February 24, 2016

Autumn tag show off


Tag show off using a Custom kit that was made for me by


thank you Carrie!

I love my kit!


tube is Leaf Fall by
© Alex Prihodko

of


you can purchase this and his many other beautiful works of art


you can purchase Carries beautiful kits at the above link


Saturday, February 20, 2016

Lucky Cristina tag tutorial


Lucky Cristina Tag tutorial
by Ladyjai3Creations
Febuary 2016


supplies

paint shop pro i am using version x6 but any version will do

a tube

i am using a tube by © Alex Prihodko you can purchase this tube and a license at
PFD

Scrap kit- i am using Lucky Me by GOF_Designs which you can purchase at PFD also

font- irish saddle

filters

eye candy -gradient glow  (copyrights and license)


ok lets start


open a new image 800 x 800 (we'll resize later)

c&p frame 5 as new layer

magic wand, click in the center of frame, c&p paper 3 as new layer, selections invert, hit delete on
keyboard, select none. drag you paper below the frame layer

back to top layer, c&p your tube, resize by 55% then 80% put on left side of tag, sharpen then add DS- i used 2 -2 68 7

c&p ele 2 and duplicate 3 x and arrange under tube, make it look thick then merge those together (merge down)

c&p ele 1 as a new layer, resize by 55% put on right hand side under tube and on top of grass

c&p ele 33 resize by 55% then 80% place on left side behind tube

c&p ele 77 resize by 55% then 80% place behind tube in front of stones, sharpen add DS

c&p ele 68 resize by 60% place behind stones, sharpen add DS

c&p ele 58 resize by 55% place by coins, sharpen add DS

c&p ele 64 resize by 55% place by coins sharpen add DS

c&p ele 43 place in front of tube at bottom sharpen add DS

c&p ele 53 resize by 55% 2 x and place by the pot of gold and stones (look at my tag for reference) sharpen and add DS

c&p ele 30 resize by 55% 2 x and place on one leg of tube, sharpen add DS

c&p ele 31 place behind tube off to the right (see my tag for placement)

c&p ele 10 resize by 55% 2 x then 80% image free rotate right by 20 all layers unchecked place at bottom of tag

c&p ele 44 resize by 55% 1 x and place at the bottom by her other leg, add a thick white gradient glow,

merge visible, resize by 600 x 600 pixels (you can resize any size you want though) add your

copyrights and license save as png

you are done!


i hope you have enjoyed this tutorial and it was easy to follow.  i would love to see your results, send them to me and i will showcase them here. thanks for trying my tutorial


Ladyjai3Creations
Febuary 2016
Lucky Cristina tag tutorial

Sunday, February 14, 2016

Barbara Jensen Black Velvet tutorial


Barbara Jensen Black Velvet Forum Style tag tutorial
by Ladyjai3Creations
Febuary 2016


filters

muras meister copies

dsb flux- center mirror

eye candy 4000- gradient glow (copyrights, but this is optional)
HSB noise


a tube

font of choice ( i used MA sexy and the light grey color in her hair for my name)
i am using a tube by Barbara Jensen

please do not use her art without a license

you can purchase a license and her beautiful art here

www.barbarajensentubes.com


ok lets start


open a new image transparent 600 x 250


c&p your tube


muras meister copies , wallpaper rotate at default


repeat copies with same settings, gaussian blur at 10% monochrome checked


dsb flux- center mirror at default setting


c&p your tube and place on left hand side ( will be moving it later)


get out your rectangle tool and draw a medium rectangle on your tag

with these settings


convert to raster layer, magic wand tool and click the inside of your rectangle, selections modify


expand by 2, c&p your tube as a new layer, move around and center her eyes


selections invert delete select none. in your layer palette, set this layer on soft light and merge down


muras meister copies with these settings


duplicate your copies layer, image mirror, then merge down add a DS (2 -2 68 7)


place your main tube in the center add a DS 0 20 68 7


bring tube to top layer


add new raster layer, select all, flood fill with color of choice ( i used the lighter grey in her hair)


selections modify contract by 3, selections invert push delete on keyboard select none


eye candy 4000- Hsb noise with these settings


keep clicking random seed until you get the color you want, add some noise to the frame, add DS ( 2 -2 68 7 black) and a thin gradient glow using the same color as your frame


add your copyrights and license and name , save as jpg and you are done!


i hope you have enjoyed this tutorial and it was easy to follow. i would love to see your results , send them to me and i will showcase them here. thanks for trying my tutorial!


here is what Shayne did
just fabulous results Shayne! thanks for my tag!


Ladyjai3Creations
Febuary 2016

Barbara Jensen Black Velvet Forum style tag tutorial