Friday, November 29, 2019

Scarlet Coffee Snags


some snags for you

The tube is used is 
Scarlet by

© Alehandra Vanhek 

and you can buy this tube at
www.picsfordesign.com 


The kit i used is 
Blushing Cafe by

Pink Paradox Productions
you can purchase the kit here

http://www.pinkparadoxproductions.com/store


hope you enjoy them


Monday, September 23, 2019

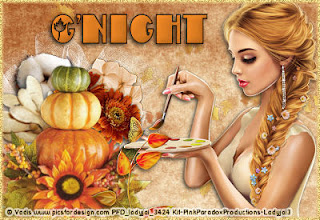
Autumn Artist Snags


hello a new set of autumn snags for you


tube is by
© Vadis 

you can purchase this tube at PicsforDesign.com

"Autumn Fantasy"

the kit i used is Autumn Mood and it is available at

www.pinkparadoxproductions.com/store


i hope you enjoy them

thanks for looking!


Tuesday, September 17, 2019

Autumn Fantasy Tag Tutorial


Autumn Fantasy Tag Tutorial
by Ladyjai3Creations
September 2019


what you will need

a tube- i am using a beautiful autumn tube by © Vadis entitled Autumn Fantasy
you can purchase this tube at PicsforDesign.com


an autumn themed kit

i am using Autumn Mood by Pink Paradox Productions

you can purchase this kit here

http://www.pinkparadoxproductions.com/store


filters

eye candy 4000- gradient glow & hsb noise
(i use the gradient glow for the copyrights info)

font for name

October Twilight

you can get this at DaFont.com


a mask of choice

ok lets start

open a new transparent image 800 x 800
(we'll crop it later)

c&p frame 5 and center it resize to fit

get your magic wand  mode replace match mode RGB value tolerance 0 contigeous checked feather 0 anti alias unchecked


click in center of frame c&p paper 12 selections invert, hit delete on keyboard select none, drag background under frame go back to top layer


magic wand again click in center c&p your tube but mirror it first selections invert, hit delete on keyboard, select none 


blend mode luminance legacy bring properties of that layer down to about 50 or so, drag your tube under the frame, add drop shadow of choice to your tube, go to top layer again


c&p your tube resize to fit i resized mine 70% 2 x and place on left side of tag, sharpen add DS

go to your bottom layer, c&p frame 6 resize by 70% 1 x sharpen, add DS

top layer c&p ele 112 resize and place on right side of tag, sharpen add DS

c&p ele 94 resize by 70% 2 x and place behind pumpkins on the left side sharpen add DS

c&p ele 85 image mirror place behind pumpkins on right side sharpen add DS

c&p ele 68 resize by 70% 1  and drag this under the tube, layers duplicate and move to left side , merge down, sharpen


c&p ele 43 resize by 70% 3 x and then 1 x by 80% sharpen, place behind tube on her right side

c&p ele 89 resize by 70% 4 x and place behind pumpkins kind of in the center sharpen add DS

go to bottom layer c&p paper 17 apply your mask , effects , photo effects, film and filters,filter look,  warm earth tones, creative filters, warming
click ok


crop your tag to whatever size you want, merge visible, resize your tag, i usually resize to 500 x 500

, add your copyright info, license info, designer credits and your own taggers watermark.

save as png.


thanks for trying my tutorial, i hope you had fun and it was easy to follow. 


Autumn Fantasy Tag Tutorial
by Ladyjai3Creations
September 2019


Thursday, August 8, 2019

Mauve Mocha Tutorial


Mauve Mocha Tutorial
by Ladyjai3Creations
August 2019


what you will need

paint shop pro
a tube

I am using Actana by © Misticheskaya
you can buy this at PicsforDesign.com

a scrap kit

i am using Mauve Mocha by Pink Paradox Productions
you can purchase the kit here

http://www.pinkparadoxproductions.com/store

filters

eye candy 4000- gradient glow & hsb noise

font used for name- Dekthusian 

you can pick this up at Dafont.com 


Lets begin


open a new transparent image 600 x 250

c&p paper 26 onto the canvas

c&p your tube resize to fit (i resized by 67% 4 x) and place on right side of tag sharpen add DS (V-2 H 2 Opac 68 Blur 7)


go to background layer and c&p ele 140 resize to fit, and place on left side of tag behind tube

once again background layer, c&p your tube again and place on left side, image mirror resize a bit,

 blend mode soft light, and take the layer properties down to between 40-50 add DS

c&p ele 93 resize place behind tube on the splatter, sharpen add DS

c&p ele 119 resize to fit and place behind left side of letter sharpen add DS

c&p ele 120 resize and place behind pink flowers, sharpen add DS

c&p ele 20 resize and place in front of letter on right hand side sharpen add DS

go to top layer, add new raster layer, select all, flood fill with a color from your tube, selections contract by 2, hit delete on your keyboard select none

add a thin gradient glow to the frame using the same color as your frame
go to your original frame, adjust, blur, gaussian blur at 10

go to your top layer, add noise, uniform at 40% merge down, sharpen

add your copyright info, license info and designers credits and your own taggers watermark
merge all flatten, save as jpg


thats it! youre done! i hope you enjoyed this tutorial! thank you for trying my tutorial. 


Mauve Mocha Tutorial
by Ladyjai3Creations
August 2019


Tuesday, May 28, 2019

Beach Dreams Tag Tutorial


Beach Dreams Tag Tutorial
by Ladyjai3Creations
May 2019


what you need 

a tube

i am using Meloni by © Alehandra Van_Hek

you can purchase this tube at www.picsfordesign.com


a scrap kit

i am using Nautical Dream by

Pink Paradox Productions

you can purchase this kit at
http://www.pinkparadoxproductions.com/store


filters

eye candy 4000- gradient glow
(copyright & license info)

font for name

Saginaw 

you can pick it up at Dafont.com 


ok lets start


open a new transparent image 800 x 800 (we'll crop down later)

c&p frame 2 onto the canvas resize by 60% 1 x 

get out your magic wand, click in middle of frame selections expand by 2

c&p paper 19 selections invert hit delete on keyboard select none

drag paper under frame back to top layer

c&p your tube resize by 50% 1 x

sharpen add drop shadow (H 2 V -2 Opacity 68 Blur 7)

c&p ele 69 resize by 70% 1 x and place under tube towards the left duplicate and place copy on right side, merge down

c&p ele 57 resize by 62% 1 x and place behind tube on right hand side

c&p ele 106 resize by 65% 1 x and place behind lighthouse towards the left side of lighthouse

c&p ele 64 resize by 65% 1 x and place behind the palm tree 

c&p ele 53 resize by 65% 2 x place behind tube on left side sharpen add DS

c&p ele 49 resize by 65% 3 x place behind the tube behind her foot sharpen add DS

c&p ele 20 resize by 65% 3 x and place in front of tube sharpen add DS

c&p ele 21 resize by 65% 3 x place in front of tube on sand sharpen add DS

c&p ele 46 resize by 65% 4 x place in front of lantern sharpen add DS

c&p ele 45 resize by 65% 4 x and place beside first shell sharpen add DS

c&p ele 72 resize by 65% 1 x and place behind tree sort of to the left of it sharpen

c&p ele 24 resize by 65% 2 x and place behind tube on left of tube sharpen add DS

c&p ele 55 reize by 65% 1 x place behind tube towards the palm tree (see my tag for placement)
go to top layer now you can crop your tag to whatever size you like

merge visible, resize to size you like, add your copyrights, license info, designer credits and your own taggers watermark

save as png. i also use a light white gradient glow on the credits

thats it! i hope you enjoyed this tutorial and it was easy to follow. thanks for trying my tutorial!


Beach Dreams Tag Tutorial
by Ladyjai3Creations
May 2019


Monday, May 20, 2019

Cute Hood Tag show off


i was just fooling around and made this

the tube i used was by

© Elias Chatzoudis

i purchased this tube at

www.cdoestore.com 

you can find many other of his gorgeous tubes over there as well


thanks for looking!!


Ladyjai3Creations
May 2019


Monday, May 6, 2019

Fantasy Princess Tag Show Off


just a tag show off tonight


i used the beautiful art of

© Alehandra Vanhek


you can purchase this gorgeous tube here


https://vmartists.com/index.php?route=product/search&filter_name=princess


i also used the matching kit "Princessland" and you can purchase that here


http://dreamingwithbella.com/store/index.php?main_page=product_info&cPath=10_162&products_id=9133


thanks for looking!


Ladyjai3Creations
May 2019


Tuesday, April 30, 2019

Summer Breeze template


i made a new template and you can download it here

https://www.4shared.com/file/Nkwu1Qb9gm/summerbreezetemplate-LJC.html


just copy and paste  into your brownser


here is what i did with mine


i used the beautiful art of © Alex Prihodko

you can purchase this tube at 
www.picsfordesign.com 

the tube is called
On the Beach 3


the kit i used is called Seaside Breeze by
Designs by Vi 

you can also purchase it at
www.picsfordesign.com 


thanks for looking and hope you have fun with it!


Sunday, April 28, 2019

Springtime tag show off


Just a tag show off tonight

i used the beautiful kit 

"Springtime" by

Elli's Creations 

you can purchase this kit here


http://picsfordesign.com/en/catalogue/id_136035_springtime.pix


no tubes were used, just the elements in the kit


thanks for looking!


Ladyjai3Creations
April 2019

Blue Phoenix Tag Tutorial


Blue Phoenix Tag Tutorial
by Ladyjai3Creations
April 2019


what you need

paint shop pro

a tube

i am using Phoenix by

© Alehandra Van_Hek 

you can purchase this beautiful tube at
www.scrapsandcompany.com


filters

muras meister- copies

eye candy 4000- gradient glow

font of choice

penta.com- jeans


Open a new transparent image 600 x 250

eye dropper tool take a light color from your tube for foreground and slightly darker one for your background

c&p your tube and place in center (resize if needed)

muras meister copies wallpaper rotate default settings
adjust blur gaussian blur at 15%  

c&p your tube resize to fit, place on right hand side, sharpen add DS ( i used H 2 V-2 Opacity 68 Blur 7)

layers duplicate, image mirror, bring properties of that tube down to 35 or so, sharpen add DS

new raster layer, select all flood fill with you foreground color, selections modify contract by 2 selections invert add inner bevel of choice, select none

add a thin gradient glow the same color as your frame, layer duplicate go to original frame adjust gaussian blur at 10%

go to top layer, eye candy 4000 HSB noise  Lump width 99.12 Lump height the same as width, pattern smooth lumps seamless tile checked , just kind of play around with it to get the color you want


penta.com- jeans default setting then adjust sharpen 


add your copyright & license info, your own taggers watermark & your name, merge all flatten save as jpg


you are done! thanks for trying my tutorial, i hope it was fun and it was easy to follow. i would love to see your results, send them to me and i will showcase them here


Blue Phoenix Tag Tutorial
by Ladyjai3Creations
April 2019


Saturday, April 27, 2019

Lavender Love snags


a new set of snags for you

i used a tube by
© Ellie_Milk 

called Marceline 2 

you can purchase this tube at
www.picsfordesign.com

The kit i used was by All Dolled Up
called
Lavender Love

you can also purchase the kit at
www.picsfordesign.com


thanks for looking, hope you enjoy


Monday, April 22, 2019

Lavender Love Tutorial


Lavender Love tutorial
by Ladyjai3Creations
April 2019


what you need

paint shop pro ( i used version x7)

font & mask of choice ( i used Ventura Regular font )

a scrap kit
i am using Lavender Love by
All Dolled Up

you can purchase it here
http://picsfordesign.com/en/catalogue/id_158342_lavender_love.pix


a tube

i am using Marceline 2 by © Ellie_Milk
you can purchase it here

http://picsfordesign.com/en/catalogue/a158462.pix


filters

eye candy 4000- gradient glow (copyrights & license info)


Lets Begin


open a new transparent image 800 x 800 ( we will crop it down later)


c&p ele 1 and place in center of your canvas

get your magic wand mode add/shift match node RGB value 0 tolerance contiguous checked 0 feather anti alias checked outside


click in the center square,selections expand by 2,  c&p pap 8 selections invert hit delete on keyboard, select none drag your paper below the frame


back to top layer, magic wand (same settings) click your wand in all the other parts of the frame selections expand by 2 c&p pap 15 selections invert, hit delete on keyboard, select none, drag that paper under frame


back to top layer c&p your tube as a new layer, resize to fit, sharpen add DS (H 2 V-2 Opacity 68 Blur 7)


go to bottom layer c&p pap 15 apply your mask merge group, photo effects film & filters, vivid & champagne density 20


go to your frame layer c&p ele 65 and kind of place to the left 

c&p ele 92 resize to fit, and place behind tube on right  hand side, sharpen add DS

c&p ele 93 resize to fit, and place on left side behind tube, sharpen add DS

c&p ele 94 resize to fit, place behind tube on left side in front of ele 93 sharpen add DS

go to the layer with ele 93 (flowerpot) c&p ele 99 resize kind of small, place on top of pot so it looks like they are in the pot  layers duplicate and place over to the right a bit, merge down 2 x
c&p ele 108 resize to fit, and place in front of pot and bowls sharpen add DS

go to frame layer, c&p ele 58 resize by 70% 1 x and place on right side of frame sharpen

go to top layer, c&p ele 43 resize to fit, and place on left hand side sharpen add DS

c&p ele 18 resize by 70% 4 x and place behind perfume bottle, rotate 20 to the right, sharpen add DS

c&p ele 21, resize by 40% then 50% sharpen add DS then place on the flowers at the top of the frame

c&p ele 118 resize by 70% 1 x and place behind the flowers in front of the flowerpot sharpen add DS but pick a light purple color 

now you can crop your tag , merge visible , resize your tag to whatever size you like, add your 

copyright & license info, designer credits and your own taggers watermark, merge visible, save as

 png. or merge all flatten and save as jpg


thanks for trying my tutorial! i hope you had fun and it was easy to follow. i would love to see your results, send them to me and i will showcase them here


Lavender Love tutorial
by Ladyjai3Creations
April 2019


Saturday, April 20, 2019

Umbrella Tutorial


Umbrella Tutorial
by Ladyjai3Creations
April 2019


what you need

font of choice (i chose Steamy a steampunk font)

paint shop pro (i used vs x7)

a tube  (one with a close up)

i am using a tube by  © Alehandra Vanhek
called Umbrella


you can purchase this tube at
www.vmartists.com 


filters


AP lines- silver lining

Muras meister-copies

eye candy 4000- gradient glow

penta.com- jeans


Lets have some fun!


open a new transparent image 600 x 250

c&p your tube as a new layer, resize to fit and place in center

muras meister copies - wallpaper rotate default settings

adjust blur - gaussian at 12% 

adjust blur - motion blur  angle 315 strength 100

AP lines- silver lining default setting

c&p your tube resize to fit, and place on right hand side of tag, sharpen add DS ( i used H 2 V-2 Opacity 68 Blur 7)

go to your background layer, c&p your close up place on left side image mirror, blend mode luminance legacy, bring layer properties to 50 or so

go to top layer add new raster layer, select all flood fill with a color from your tube (bright color)

selections modify contract by 2 hit delete on your keyboard selections invert add an inner bevel of choice, select none

add a thin gradient glow the same color as the frame you just made width 3 corners 25 opacity 100% set it on thin 


layers duplicate, go to the original frame, adjust blur gaussian blur at 10

go to top layer, penta.com- jeans default setting, adjust sharpen add DS, merge down

add your copyrights, license info, and your own taggers watermark, merge all flatten save as jpg


thats it! you are done, i hope this tutorial was easy to follow and you had fun. i would love to see your results, send them to me and i will post them here . thanks for trying my tutorial!


Ladyjai3Creations
Umbrella Tutorial
April 2019