Saturday, December 31, 2016

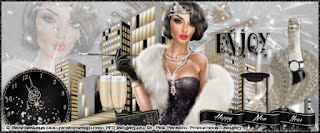
HNY snags

Happy New Year all

I hope your new year is full of happiness & prosperity

I made some HNY snags for you using a beautiful tube by

© Misticheskaya

you can purchase this tube (Barbara) at


I also used Happy New Year 2016 kit by

Pink Paradox Productions

you can purchase it here


She has beautiful kits over there

I'm sure you will find something you like


left click to bring to full size then right click to save to your own computer
as with all my snags, do not add your name to them

thanks and Happy 2017!


Thursday, December 22, 2016

Christmas snags

I made some Christmas snags for you all

I used the art of

© Zlata_M


and the matching kit by

GOF_Designs

24 Days to Christmas


Merry Christmas to all

As always please do not add your name to them

left click to bring full size then right click to save to your computer


Friday, December 9, 2016

Tag show off

hello everyone

did an animated tag tutorial

you can find it here

http://spawntuts.shirleyswebworks.com/XmasSparkle/index.html


I used the beautiful art of

© Stan Dudin

you can purchase his art and license there

the tube used is called 2 years and it was a free gift

it is an exclusive tube


I did a tag for my friend Diana of Greek Kisses BlogSpot

Enjoy Diana!


I also did one for Dave/Spawn


Hope you like Dave


Monday, November 14, 2016

Blaze Forum Style Tag Tutorial


Blaze Tag Tutorial
by Ladyjai3Creations
November 2016

what you need
paint shop pro
(any version will do)
a tube
i am using the new tube Blaze by© Zlata_M

you can purchase this tube over at PFD

but any tube that has a close up will do


a scrap kit

i am using the matching kit by GOF_Designs called


24 Day to Christmas, which you can also purchase at PFD


filters

eye candy 4000- gradient glow
(copyrights and name)

penta.com- color dot


font- chocolate heart free (Dafont)


ok lets start


open a new transparent image 600 x 250


select all

c&p ele 1 as a new layer ( move it around a little to where you want )
when happy with place select none


c&p your close up tube resize by 70% (or one of your choosing) and place on left hand side


in your layer palette change blend mode to overlay and add DS (i used V 2 H -2 Opacity 68 and Blur 7)


c&p tube (if youre using the same tube you can add either hat or bow, resize by 70% sharpen add DS


and image mirror (make sure its placed on the far right side)


get out ele 22, image rotate to left c&p ele 22 and place behind tube on right side, resize by 70% add DS and sharpen


c&p ele 83 resize by 70% 2 x and place on ribbon behind tube sharpen add DS


c&p ele 96 place behind tube and move up a little sharpen add DS


go to top layer new raster layer select all flood fill with a red color from your tube, selections modify contract by 2 selections invert, inner bevel (default)


select none. eye candy gradient glow thin setting with your red color you used for your frame, layers duplicate go to original gaussian blur at 3 go to your copy and add the

penta.com filter color dot at default then adjust sharpen merge down


add your copyrights, license number and your own taggers watermark.
merge all flatten, save as jpg.


for your name i used the colors red -background and white for foreground stroke width 1, size 48,

type out your name use the nodes to stretch it out if you want, when happy with it

convert to raster layer inner bevel add DS you can add some noise to it if you wish.


thats it! you are done. i hope you enjoyed this tutorial and it was easy to follow. i would love to see your results, send them to me and i will showcase them here


thanks for trying my tutorial


Ladyjai3Creations
Blaze Tutorial
November 2016


Friday, October 21, 2016

Happy Halloween Snags

here is a set of Halloween snags for you

I used the beautiful art of

© Zlata_M


you can purchase a license there , the tube is an exclusive at PFD.


Happy Halloween to all


Monday, October 17, 2016

Halloween Persian Snags

here are some Halloween snags for you

I used the art of
© Maryline Cazenave


and the matching kit by

Ladyhawk Designs

both which can be purchase at


just left click to bring to full size then right click to save to your computer

as with all my extras do not alter or add your name to them

thanks and enjoy!


Tuesday, October 4, 2016

Eerie Nights PTU Tag Tutorial


Eerie Nights PTU tag tutorial
by Ladyjai3Creations
October 2016

what you will need

a tube
i am using a tube by © Anna Marine (halloween 27-2)
www.facebook.com/officialannamarine


you can purchase this tube at CDO


i am also using the matching kit by
Dees Sign Depot which you can purchase at CDO also

supplies
psp- i am using version 17 but any version will do

font- Vladmir Script


ok lets create


open a new image 600 x 600 transparent


c&p frame 2 on the canvas


get out your magic wand mode add (shift) match mode rgb value tolerance 0 contigious checked feather 0 anti alias checked


click inside each one of the panes in the frame selections modify expand by 2 , c&p paper 3 as new

layer selections invert hit delete on keyboard select none

drag the background under the frame in your palette sharpen


c&p ele 17 resize by 70% 2 x and place on left side of frame (top layer)

c&p ele 4 resize by 70% 2 x and place behind the pumpkins

c&p ele 11 resize by 70% 3 x and place beside pumpkins on right hand side sharpen add DS

c&p ele 16 resize by 70% 2 x and place beside the book on right side

click on your grass layer , duplicate and image mirror

c&p your tube resize by 85% 1 x and place behind all the elements on right hand side (see my tag for placement)


go to top layer c&p ele 7 resize by 70% 4 x and place on bigger pumpkins sharpen and add DS


optional you can add ele 20 and place inbetween the elements if you want


c&p wordart 1 resize by 70% 1 x (or whatever looks good to you)


crop the excess off your image, add your copyrights, license # and your own taggers watermark merge visible save as png


you are finished. i hope this tutorial was easy to follow and you had fun. i would love to see your

results, send them to me and i will showcase them here

thanks for trying my tutorial!


Eerie Nights Tutorial by
Ladyjai3Creations October 2016


Tag show off


here is an animated tag I made using the beautiful art of

© Arthur Crowe

www.arthurcrowesfactory.com


I used a tutorial found here

http://spawntuts.shirleyswebworks.com/2013Tutorials/Wanda/index.html


The tube is called "Autumn Purple"

Fantastic tube to work with


thanks for looking


Friday, September 16, 2016

Autumn Love Tag Tutorial


Autumn Love Tag Tutorial

what you will need

paint shop pro
a tube
an autumn scrap kit


I am using a beautiful free autumn kit by Elli Creations at PFD called Autumn is here

I am using a tube by Alex Prihodko called Leaf Fall

you can buy this at PFD and a license

do not use without a license please

i didnt use any filters but i used a gradient glow on the copyright & my name font used is Autumn nights (eye candy 4000)


ok let begin

open a new image 400 x 275 transparent


resize paper 7 to 400 x 400 and c&p as new layer on your canvas sharpen

c&p ele 18 as new layer sharpen add DS 2 -2 68 7

c&p ele 20 and put below your last ele resize by 70% all layers unchecked add DS

c&p elements 38 & 41 resize to fit (i resized by 60% 2x) sharpen add DS

c&p ele 75 resize to fit duplicate, merge down sharpen add DS

go to top layer, c&p ele 55 resize to fit, sharpen add DS and place on left side of pumpkins

c&p ele 11 resize by 60% 2 x and place in front of pumpkins sharpen add DS

c&p ele 52 resize 1 x by 60% sharpen add DS

c&p your tube resize by 60% 3 x if you are using the same as i am. place on right hand side, sharpen add DS

c&p ele 76 resize by 60% 2 x and place behind pumpkins sharpen add DS

go to top layer c&p ele 72 resize by 60% 2 x add DS, sharpen, select all float defloat flood fill with a

color from your tag then add remove noise gaussian at 23%

then add noise random at 23% select none

add new raster layer, select all flood fill with the same color as your word art selections modify

contract by 3 hit delete on your keyboard selections invert effects 3d effects add inner bevel at default
select none add DS 1 1 68 7 then change the V&H to -1


add your artist copyright , your license number and tag name, merge all flatten save as jpg


you are done! i hope you enjoyed this tutorial and it was easy to follow, would love to see your


results, send them to me and i will showcase them here
thanks for trying my tutorial!


Ladyjai3Creations
Autumn Love Tutorial
9/16/16


Sunday, August 7, 2016

Autumn Beauty Tag Tutorial


Autumn Beauty Tutorial by
Ladyjai3Creations
Aug 8th 2016


what you will need

a tube

i am using Leaf Fall by Alex Prihodko

you can purchase this at PicsforDesign


filters

eye candy 4000- gradient glow & HSB noise (optional)


Muras Meister- copies


FM File tool- blend emboss


open a new image 400 x 275 (transparent)


take two colors from your tube ( i used 2 colors from her hair) and make a gradient angle 0 repeats 10
flood fill with your new gradient


distortion effects- pixelate block width 4 height 9 symmetric unchecked


FM file tool- blend emboss at default


get out your rectangle tool width 3 all other settings at default  draw a thin rectangle across the length of your tag arrange toward the top when happy with it convert to raster


muras meister copies line setting, change number to 4 or 5 whichever looks better


using your magic wand click inside each rectangle and flood fill with your gradient your made earlier select none


layer duplicate image rotate 90 degrees to the right and arrange kind of in the middle, when happy merge down and apply DS ( same settings)


then apply DS again but change V to -2 amd H to 2


go to background layer c&p your tube then set the layer to luminance legacy opacity to around 80 or so


sharpen and add original DS


go to top layer


c&p your tube and resize to fit and place on left hand side sharpen and add DS


add new raster layer select all flood fill with a color that goes well with your tube selections modify contract by 3 hit delete on keyboard select none


add remove noise random at 30% monochrome checked add a thin gradient glow to the frame using the same color as your frame


then add DS then repeat DS using V -2 H 2


now if you want you can add your own text like i did, i wrote Autumn across the top then beauty going down the side


i used the font autumn deco stroke width 1 black for foreground and orange for background and i also used texture effects blinds for the words


for my name i used the font autumn nights ( they are both free fonts ) i also used an orange thin


gradient glow for my name


Add your copyrights, license and your own taggers watermark, merge all flatten save as jpg


thats it you are done, i hope you enjoyed this tutorial and it was easy to follow. i would love to see

your results. send them to me and i will showcase them here


thanks for trying my tutorial!


Ladyjai3Creations
Autumn Beauty tag tutorial
August 2016


Saturday, August 6, 2016

Karen Middleton Snags


Some snags for you using the art of

© Karen Middleton
www.colourbelle.com


I used the Pure Gold tag tutorial of mine
Just used a different tube with it

just left click to bring to full size then right click to save to your computer

thanks for looking and enjoy!