Tuesday, August 10, 2021

Tag show off


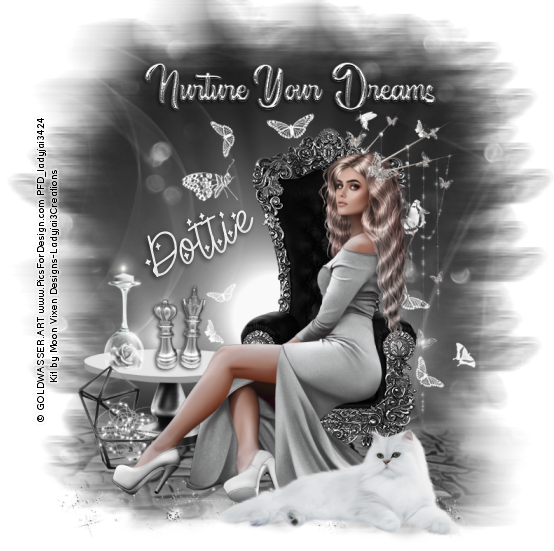
i did a new tag using the other tube in the kit
"Sterling Silver"


© GOLDWASSER.ART

Kit by Moon Vixen Designs
you can purchase this kit at

PicsforDesign.com 


thanks for looking!!


Saturday, August 7, 2021

Sterling Silver Tutorial


Sterling Silver tutorial
by Ladyjai3Creations
August 2021


You will need 
paint shop pro (i am using X7 but any version will do)

a scrap kit preferably with a tube

i am using Sterling Silver by Moon Vixen Designs 
you can purchase this kit at www.picsfordesign.com
(tube is included in kit)

© GOLDWASSER.ART


eye candy 4000- gradient glow and maybe HSB noise

mask of choice

font of choice


okay lets begin


open a transparent canvas 800 x 800 (we will crop down later)

c&p paper 020 

get your mask apply mask, merge group

c&p ele 062 resize by 70% 1 x place a little to the right sharpen add DS of choice

c&p your tube, resize by 70% 2 x and place on chair sharpen add DS

c&p ele 142 resize by 70% 1 x and place on right side in front of tube

c&p ele 029 place behind chair apply mask again, merge group

c&p ele 027 resize by 70% 2 x and place in front of siamese , sharpen add DS

c&p ele 090 resize by 70% 3 x and place behind siamese on right side, sharpen add DS

go to background layer c&p ele 004 resize by 70% 4 x and place on left sharpen add DS

go to top layer, c&p ele 017, resize by 70% 3 x and place in front of tube on floor, sharpen add DS

top layer, c&p ele 089, resize by 70% 3 x place in front of flowers, sharpen add DS

image canvas size resize to 850 x 850, now you can crop your image to whatever size you would like

resize to 500 width  (or whatever you want)  add your copyright info, license info, designer credits merge visible 

save as png 

you are finished! i hope you had fun using this tutorial. thanks for looking!


Sterling Silver tutorial
by Ladyjai3Creations
August 2021


Saturday, July 10, 2021

Sea Breeze tutorial


Sea Breeze tutorial 
by Ladyjai3Creations
July 2021


you will need
Paint Shop Pro (i use x7 but any version will do)

mask of choice
font of choice

a scrap kit 
i am using Sea Breeze by Elli's Creations
you can purchase it at PicsforDesign.com for $1.00

a tube any beach or sea related tube 
i am using Jillian by © Alehandra Vanhek
which you can also buy at PicsforDesign.com


okay lets begin


new transparent image 800 x800 (we will crop down later)


c&p paper 06 apply your mask merge group


c&p your tube, resize as needed, sharpen 


c&p ele 67 resize by 70% 1 x and place behind tube on right side (see my tag)


c&p ele 58 resize by 70% 2 x and place in front of palm tree sharpen


c&p ele 90, pull down to bottom , apply mask again merge group


c&p ele 88 resize by 70% 2 x and place on right hand side behind tube sharpen


c&p ele 2 resize by 70% 3 x and place on left side behind tube sharpen


c&p ele 48 resize by 70% 2 x and place behind the cluster rotate 20 degrees to left sharpen


c&p ele 1 resize by 70% 3 x and place by the starfish cluster sharpen


c&p ele 18 resize by 70% 3 x and place behind tube on right side sharpen


c&p ele 27 resize by 70% 2 x and place in front of tube sharpen


now add any other additional elements you want, crop your image to the size you want,merge visible,  add your copyright info, license info and designer credits, save as png. 


thats it! thanks for looking i hope you enjoyed the tutorial and it was easy to follow


Ladyjai3Creations
Sea Breeze tutorial
July 2021


Thursday, July 1, 2021

4th of July snags


Some fourth of July snags for you

The kit i used is a new kit by
Elli's Creations called
"4th of July"

you can purchase this kit at www.picsfordesign.com 


i hope you enjoy them and Happy fourth to everyone who celebrates!


Sunday, June 6, 2021

Flowers for Amy snags


new snags for you
"Flowers for Amy"

The tube i used is by
© Misticheskaya 
you can purchase this tube at
www.picsfordesign.com

The kit i used is
Uncovering Spring by
Pink Paradox Productions

you can pick up the kit at
www.wickeddiabladesign.com 


thanks for looking!
enjoy!


Friday, May 7, 2021

Coffee Break tutorial


Coffee Break tutorial
by Ladyjai3Creations
May 2021


you will need
 

coffee themed scrap kit

i am using Coffee Break by Wicked Diabla Designs

you can purchase this at www.picsfordesign.com


a coffee themed tube

if you are using this kit the tube already comes with the kit it is by © Julia Fox (credit for for copyright)


mask of choice 


eye candy - gradient glow (for the copyrights)


DS- drop shadow ( V 2 H -2 Opacity 68 Blur 7)


font used for name coffee latte (www.1001fonts.com)


Lets get started


open a new transparent image 800 x 800 ( we'll crop it later)


c&p ele 99 resize by 80% 1 x


go to your magic wand, click in center of frame selections expand by 2, c&p paper 3 selections invert, hit delete on keyboard, select none, drag paper under frame


top layer, magic wand click in center of frame,selections expand by 2,  mirror your tube, c&p your tube

 as new layer selections invert, hit delete on keyboard, select none drag tube under frame blend mode

 soft light bring layer properties down to about 58 or so add DS (undo your mirror tube)


top layer, c&p tube place on left side, resize by 70% 3 x sharpen add DS


c&p ele 22 resize by 70% 3 x and place on right side of tag sharpen add DS


c&p ele 15 resize by 70% 3 x and place in front of coffee bag sharpen add DS


c&p ele 1 and place in front of coffee grinder resize by 70% 3 x sharpen add DS


go to frame layer c&p ele 18 resize by 70% 3 x and place under bag and coffee cup sharpen add DS


c&p ele 88 resize by 70% 3 x and place behind coffee bag on left side sharpen add DS


c&p ele 100 resize by 70% 4 x and place in front of coffee cup sharpen add DS duplicate and resize by 85%


c&p ele 5 resize by 70 % 3 x and place behind bag on left side right on doily sharpen


c&p ele 30 resize by 70% 3 x and place behind doily sharpen add DS


c&p ele 37 resize by 70% 3 x and place behind bag layers duplicate and bring down a little sharpen add DS


go to bottom layer c&p ele 55 


top layer c&p ele 84 resize by 70% 3 x and place beside books. sharpen
 

go to bottom layer c&p paper 6 apply your mask merge group 


top layer go ahead and crop your image to whatever size you want, merge visible resize image (i resize mine to 500 width)


add your copyright info, license info and designer credits and your own taggers watermark merge visible save as png


thats it! you are done i hope you had fun with this tutorial and it was easy to follow. thanks for looking


Coffee Break tutorial
by Ladyjai3Creations
May 2021


Thursday, April 15, 2021

Lady of the Lake snags


here is a group of 8 snags for you
the kit i used is Lady of the Lake by 
Kitty Scrap

you can purchase it at
www.digi-crea.fr 

i hope you enjoy them