Tuesday, February 28, 2017

Ginger Snap Tag Tutorial


Ginger Snap TagTutorial

what you will need
a tube

one with a close up

a scrapkit

i am using Ginger Snap by Jose Cano and the matching kit by Bookworm Designz

you can purchase both of them over at www.canotubes.com
please do not use his tubes without a license


filters

eye candy 4000- gradient glow


lets begin


open a new transparent image 400 x 275

c&p paper 9 but resize to 400 x 400

c&p your close up tube and resize to fit, place on left side of tag, sharpen add DS (your choice)
get your rectangle tool draw a thin rectangle on your tag towards the center, from top to bottom,

using a dark color from your tube for foreground and light color for background,  add an inner bevel,


layers duplicate, resize by 85% all layers unchecked, duplicate then resize by 85% all layers unchecked.  then merge those 3 together add DS sharpen


click on your background layer in your palette, c&p ele 13 resize by 70% 1 x and arrange how you like sharpen add DS using the dark color of your tube


c&p ele 17 resize until you have it the size you want, place on vertical bars you made earlier, add DS color black


click on your background layer, c&p ele 32 and just move it around where you like it


c&p ele 35 resize by 50% 2 x and place on right side of tag, sharpen add DS (2 2 60 7)
still on the top layer, add a new raster layer select all flood fill with your darker color, selections modify contract by 2 hit delete on keyboard, select none


add a thin gradient glow using the same color as your frame, layers duplicate, working on original,

adjust blur gaussian blur 6 go to top layer, change blend mode to dissolve, sharpen,merge down

c&p ele 6 resize by 50% 2 x then 70% 1 x and place behind bottle sharpen add DS using the light color of tube


c&p ele 12 and place on her hair but this is optional


add your copyrights, license info and your taggers watermark and name, merge all flatten, save as jpg. you are done!


i hope this tutorial was easy to follow and you had fun. send me your results and i will showcase them here. thanks for trying my tutorial


Ladyjai3Creations
Ginger Snap Tag Tutorial
February 2017


Monday, February 27, 2017

Striped Timeline Tutorial


Striped Timeline Tutorial

what you will need


a tube
i am using a tube (Mob Scene) by
©Barbara Jensen
and your can purchase this
at

you must have a license to use her tubes


but any tube with a close up will do
if you don't have this one


filters

eye candy 4000- gradient glow

xero- greytinter

fm file tools- blend embross

simple- zoom out and flip


Lets have some fun!


open a new transparent image 851 x 315

take 2 colors from your tube using your eye dropper tool and make a gradient from the foreground (used black & grey)

linear angle 0 repeats 10 flood fill your canvas with the new gradient you just made

distortion effects, pixelate width 4 height 9 symmetric unchecked

simple zoom out and flip

fm file tools- blend emboss default settings


c&p your tube and place on right hand side. sharpen add DS 0 13 68 12


c&p your close up and place on left hand side, xero- greytinter at default settings, pull your close up behind your tube


go to your original tube, layers duplicate, then resize your original tube by 85% all layers unchecked


move the resized tube over to the left a little bit, add DS  then on your copy bring the layer properties down to about 48-50 add DS


working on the top layer, new raster layer, select all flood fill with a color of choice (i chose the red in her outfit) selections modify contract by 2 hit delete on keyboard select none


add a thin gradient glow using the color red or whatever color you used for the frame, layers duplicate


working on the original adjust blur gaussian blur at 6 or whatever looks good to you depending on the color you chose


now on the copy of the frame , change the blend mode to dissolve adjust sharpen then merge down, add a slight DS


add your copyrights, license info, and your own taggers watermark, (I added a gradient glow to the copyrights too)  add any text you would like, merge all flatten, save as jpg. you are done!


i hope you enjoyed this tutorial and it was easy to follow. i would love to see your results, send them to me and i will showcase them here. thanks for trying my tutorial!


here is another I did with a different tube

I used Silver by

© keith garvey

and you can purchase this tube here


it completely changes the look with a different color


Ladyjai3Creations
Striped Timeline Tutorial
February 2017


Sunday, February 26, 2017

Tag Show Off


Showing off a tag I made with the beautiful art of


© Zlata_M


This is an older tube of hers,
and cannot find it over at PFD so

it must be discontinued
I got it as an exclusive tube


The kit I used is by
Kizzed by Kelz

and can be purchased at PFD also

it is called, Vanilla Mocha Latte and it is a beautiful kit with

many elements and papers to choose from to create all your coffee tags


thanks for looking


Ladyjai3Creations

Friday, February 24, 2017

Elegant Autumn Tag Tutorial


Elegant Autumn tag tutorial
by Ladyjai3Creations
February 2017


what you will need
a tube

i am using Crystal by
©Very Many

you can purchase this tube at www.verymanytubes.com
and a license, please do not use the tube without a license

i am also using the matching kit , Elegant Autumn by
Pink Paradox Productions
you can purchase this kit here

mask and font of your choice


Okay lets start


open a transparent image, 800 x 800 (we will crop it down later)


c&p frame 15 resize by 70% then 80%


get your magic wand, click inside of your frame c&p paper 27 selections invert, hit delete on


keyboard select none, in your layer palette, drag paper below frame


go to your bottom layer c&p frame 11 resize by 70%  arrange so it is behind your frame
c&p ele 65 resize by 70% 2 x place in front of tube


c&p ele 24 , resize by 70% 4 x and place behind the books, sharpen add DS ( i used 2 -2 68 7)


c&p ele 22 resize by 70% 4 x and place kind of on the blanket with the books sharpen add DS


c&p ele 22 resize by 50% 2 x and place behind books, sharpen add DS


c&p ele 69 resize by 50% 2 x and place in front of books, sharpen add DS


c&p ele 62 resize by 50% 2 x and place on right side of frame


c&p ele 64 resize by 50% 2 x then 70% 1 x place in front of camera sharpen add DS


c&p ele 20 resize by 50% 2 x and place behind the orange pumpkin sharpen add DS


c&p ele 60 resize by 50% 2 x and place behind camera sharpen add DS


c&p ele 66 resize by 50% 2 x and place behind camera sharpen add DS


c&p ele 127 resize by 50% 2 x and place behind briefcase sharpen add DS


c&p ele 129 resize by 50% 2 x place behind the brown flowers image rotate to the left by 20 degrees all layers unchecked, sharpen add DS


c&p paper 37 layers arrange send to bottom, apply your mask of choice merge group i also applied photo effect, film and filters, glamour and the nighttime effect but thats optional


c&p ele 175 and place behind the tube and resize by 50% 1 x  sharpen, crop off the extra canvas

merge visible, resize your image to what size you want, add your copyrights , license info and your taggers

watermark. save as png . add your name with any font, i used chocolate heart free. you can find it anywhere just do a search for it.


thanks for trying my tutorial, i hope it was easy to follow and fun for you. send me your results and ill post them here.


Ladyjai3Creations
Elegant Autumn Tag Tutorial
February 2017


Copper Corkboard Tutorial


Copper Corkboard Tag Tutorial
by Ladyjai3Creations
Febuary 2017


what you need

a tube ( one with a close up)

i am using Lana by
©Very Many

you can purchase this tube at www.verymanytubes.com
but any tube with a close up will do


filters

eye candy 4000- gradient glow & hsb noise ( optional)

muras meisters copies

penta.com- color dot

font- Chase Callas


ok lets start


open a new transparent image 600 x 250


take 2 colors from your tube and make a gradient out of them
angle 25 repeats 2


flood fill your image with the new gradient


adjust add noise uniform 30% monochrome checked

adjust add noise automatic small scratch removal

c&p your tube resize to fit, (65% 2 x) place on right hand side of tag
add a thin white gradient glow to your tube


click on your background c&p your close up change the blend mode to luminance legacy bring down


the layer properties to 37 add DS (your choice) add the same gradient glow to your close up


top layer new raster layer select all, flood fill with gradient you made earlier selections modify


contract by 2 hit delete on keyboard, selections invert add inner bevel (your choice)

add gradient glow thin the same color as the frame


layers duplicate go to original frame adjust blur gaussian blur at 8 go back to top layer apply penta.com - color dot default settings then merge down add a slight DS


add your copyrights, license info and your own taggers watermark, merge all flatten and save as jpg.


add your name and you are done! thanks for trying my tutorial. i hope it was easy to follow
i would love to see your results, send them to me and i will post them here.


Ladyjai3Creations
Copper Corkboard Tutorial
Febuary 2017


Tuesday, February 21, 2017

Timeline Set- Alehandra Van_Hek


A timeline set for you

as always do not add your name or modify in any way


left click to bring to full size then right click to save to your own computer


I made this set using the wonderful art of Alehandra Van_Hek

you can purchase this through the exclusive club at


The kit I used is Rocking Shamrocks

by


This is a beautiful kit with many elements and papers to make beautiful
creations. Check out her store


thanks for looking and Happy St Pats Day!


Ladyjai3Creations
Febuary 2017


Coffee What Else FS Tag Tutorial


Coffee what else tag tutorial
by Ladyjai3Creations
Febuary 2017


what you will need

filters
eye candy 4000- gradient glow (optional)


AScrap kit
i am using Coffee What Else by
Elli's Creations
you can purchase this gorgeous coffee kit over at PFD

a tube

i am using Good Morning by Alex Prihodko

you can purchase this tube at PFD also

font- coffee at midnight


Lets start


open a new image 600 x 250 transparent


c&p paper 5 on your canvas


c&p ele 4 resize by 70% and place behind tube on right hand side (see my tag for placement)


c&p element 44 and place at top left hand corner


c&p ele 12 and place under wordart


resize by 40% then 70% sharpen add DS (  i used 2 -2 68 7)


c&p ele 22 resize by 70% 2 or 3 x sharpen add same DS


c&p ele 69 resize by 50% 2 x and place behind coffee cup sharpen add same DS


c&p ele 84 resize by 50% then 70% place behind coffee cup but to the right a little sharpen add same DS


c&p ele 90 resize by 50% 2 x and place on coffee cup, sharpen add same DS


now go to your top layer in your layer palette, add new raster layer, select all, flood fill with a brown


color from your canvas selections modify contract by 2 and hit delete on your keyboard select none


i added a thin gradient glow using the color brown to the frame and some noise to the frame (random 50% monchrome checked) and also used a fat white gradient glow on the copyrights


add your copyrights, license number and your own taggers watermark save as jpg and you are done!


i hope you enjoyed this tutorial and it was easy to follow. thanks for trying my tutorial. send me your results and ill post them here


Ladyjai3Creations
Coffee What Else tutorial
Febuary 2017


Sunday, February 19, 2017

Clare Lune Tutorial


Clare Lune Tutorial
by Ladyjai3Creations
Febuary 2017


what you need
a tube


i used a beautiful tube by © Zlata_M (exclusive Clare Lune) i used the blue dress layer

you can get this image through the exclusive club @ www.picsfordesign.com


filters

filters unlimited 2.0- paper textures- striped paper fine

muras meister- copies

eye candy 4000- gradient glow

aaa frames- foto frame

fonts- dekathusian & suave script


open a new image 600 x 250 transparent


eye dropper tool , take a light and dark color from your tube
make a gradient from the two colors angle 36 repeat 1
flood fill with the gradient you made


filters unlimited paper textures striped paper fine at default

c&p your tube and place on left hand side and resize a bit to fit

muras meister copies line all settings at default but set the number to 3
blend mode luminance legacy and bring the properties of that layer to 45-50 add DS i used 2 -2 68 7
i used a gradient glow all at default and the thin white setting


get out your rectange tool and draw a thin rectangle all the way across your canvas using your gradient for background and darker color for foreground convert to raster once you get it where you want


then get your text tool choose your font, i used dekathusian, size 10 and write your text, i wrote moon

& stars convert to raster then muras meister copies line but set the number to 6 or 7, then convert to

raster, and duplicate the text until it fills the rectangle, merge the text together then add a gradient
glow using the light color from your tube

merge down ( text and rectangle) c&p your tube and place on right hand side sharpen, add DS (same settings as before)


aaa frames - foto frame width 10 opacity 80 all other settings at default


go along each layer and apply the foto frame with these settings

when you get to your background apply foto frame then select all selections modify contract by 11

selections invert selections promote selection to layer select none

change the blend mode to multiply for the promoted selection


add your copyrights, license number and your own taggers watermark, merge all flatten save as jpg

you are done! i hope you enjoyed this tutorial and it was easy to follow. send me your results and I


will post them here. thanks for trying my tutorial


Ladyjai3Creations
Clare Lune Tutorial
Febuary 2017


Friday, February 17, 2017

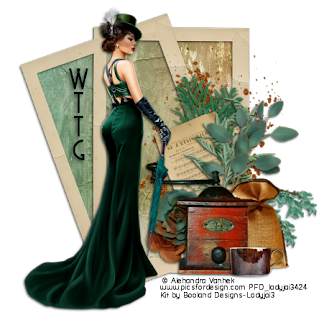
Vintage Girls Snags

Hello everyone

I have a set of snags for you

The tube I used is

© Alehandra Vanhek

www.picsfordesign.com

it was an exclusive tube

and the kit I used is by

Booland Designs

it is called Copper Verdi and it is just a gorgeous kit

love the colors

so I hope you enjoy the snags

they are only png format

left click to bring to full size

then right click to save to your computer , save as png